
Advance through each section in the
order it
is presented before moving on to the next
section.
REMINDER: Review/edit Contact Preferences
before sending an email from V8 Email
Editor.
ACCESS
Go to Administrators
Control Panel >
COMMUNICATION >
EMAIL >
select SEND
EMAIL, VIEW EMAIL
DRAFTS or VIEW SENT
EMAILS.

Welcome
Message Template
When a new member joins your
chapter, send a Welcome Message
with links to your chapter site
and instructions how to access.
Go to your DRAFTS folder
to find
a Welcome Message Template
announcement. Edit as desired
before sending.
It may be found in the
SENT folder if not duplicated
after sending. If so click REOPEN
> edit as needed and Save As
Draft or send to newest
member.

COMPOSE
Go to
Administrators
Control Panel
>
COMMUNICATION
> EMAIL
> SEND
EMAIL > or click COMPOSE tab in
editor.

TIP: Red asterisk = required
field for save as
draft, send test,
or send email.

SENDER
Administrator/Agent
Click Choose > select Name. If there is more than
one email address, select email address.
TIP: Select @yourdomainname (for
example admin@groupname.org)
or @gmail email
addresses for best delivery
results. @aol,
@outlook, or
@yahoo email
addresses as sender may
result in poor
delivery.
Member as Sender
Click Choose > select Select a Member as
sender > click Select a
Member > select member
name. If there is more than
one email address, select email address.
TIP: @aol, @outlook, or
@yahoo email
addresses as sender may
result in poor
delivery.
Spouse as Sender
Click Choose >
select Select a Spouse as
sender > click Select a
Spouse > select spouse
name. If there is more than one
email address, select email
address.
TIP: @aol, @outlook, or
@yahoo email
addresses as sender may result
in poor
delivery.
RECIPIENTS
NEW FEATURES
- Send cc and bcc (site
administrator defaults as bcc
always).
- Send to children,
spouse/partner
assistants.
- View recipient names in
same screen, includes
spouses/partners,
member/spouse
assistants and
children. Deselect on
the fly.
- Names with missing email
addresses identified
in red before
sending.
- Select event by menu in
alphabetical order, or by calendar
date, invitee information
displayed.
- Send to invitees, everyone who's
invited to attend.
- Send to event attendees or
non-responders. Sends to members
and/or spouses/partners based on
individual responses.
- Send to Divisions (displays only
on sites with divisions).
- Send to Forums, individually or
all, Forum Moderators
Only.
- Set Contact Preferences to
preferred email addresses and text
cell numbers.
- Send to Non-Members.
Overview for each Recipient
'select by' option follows:
TIP: Red asterisk indicates
this is a required field to s ave as draft, send
test, or send email.
Member Type - menus vary by
site
FOR SITES WITH ONE MEMBER
TYPE
RECIPIENTS > click Choose >
select Member Type > select send to >
select cc to .
FOR SITES WITH MULTIPLE MEMBER
TYPES
RECIPIENTS > click Choose >
select Member
Type >
select desired member
type > select send to > select cc to.
OPTIONAL: Click + to
view RECIPIENT names
and uncheck names as
needed.
TIP: Viewing Recipient
names list, (S) =
Spouse/Partner/Fiancé/Significant
Other, (C) = Child, (MA) =
Member Assistant, (SA) =
Spouse/Partner Assistant.
Names in red = missing
email address, do not need
to be unchecked to send
email.
Event
RECIPIENTS > click Choose >
select Event > select
event
using select by title or select by date > select send
to > select cc to.
OPTIONAL: click + to view RECIPIENT names,
uncheck
names as needed.
Division - available on select
sites
RECIPIENTS > click Choose >
select Division >
select desired divisions > choose
member type(s) > select send
to > select cc
to.
OPTIONAL: click + to view RECIPIENT names,
uncheck names as
needed.
Group - menu varies by
site
FORUMS
RECIPIENTS > click Choose >
select Group > click Choose > click Forums > select forum
type(s) (varies by site) > select desired forums > select send
to > select cc
to.
OPTIONAL: click + to view RECIPIENT names,
uncheck names as needed.
CHAPTER OFFICERS (title
varies by site)
RECIPIENTS > click Choose >
select Group > click Choose > select Chapter
Officers > select send
to > select cc to.
OPTIONAL: click + to view RECIPIENT names,
uncheck
names as needed.
Directory individually
RECIPIENTS > click Choose >
select Directory individually > select desired member
type(s) > select send
to > select cc
to > click + to
view RECIPIENTS list
> select desired name(s).
Send to a Non-Member
RECIPIENTS > click Choose >
select Send to a Non-Member >
type recipient name > type email > click + add
another as needed > repeat
as desired.
TIP: Non-members cannot access the
site and RSVP to events on the
event page, therefore inserted
event RSVP links result in landing
on the log in screen.
SUBJECT
Enter the subject line here.
TIP: red asterisk indicates this
is a required field to s ave as
draft, send test, or
send email.

MESSAGE
NEW FEATURES
- Updated toolbar
- Clear All option
- File > New document
to erase message and
start fresh
- File > Preview to
view email before
sending
- File > Print email
for easier
proofing
- Select fonts and
sizes
- Assign linked text to
preferred font, font
size and color
- Easily center images, plus
more!
- Select event by title
alphabetically or by calendar.
Event title and invitees
display.
- Updated event invitation
design
- New default typeface,
larger point size
- RSVP buttons at top and
bottom of invitation
- Custom select event content
before insert, including
new CANCELLATION POLICY
and UPCOMING EVENTS
- Embedded videos
automatically convert to
linked text
- New save signature module
Insert event
MESSAGE > click select an
insert dropdown menu > select Event > select by title
– select event title from
menu > or select by date – use arrows to select
month, click date > view
event date, title, subtitle and
invitees > select desired content >
click INSERT.
TIP: Videos embedded on event
page convert into link "Click
here for video" when inserted
into V8 email.
Insert offline event
MESSAGE > click select an insert
dropdown menu > click Event > click include offline events
in selection toggle switch to YES > offline events
are added to – title menu with
"(offline)" following event title, or
on calendar with pink square behind
date.
Select Event > select by
title – select event title from
menu > or select by date – use arrows to select
month, click date > view
event date, title, subtitle and
invitees > select desired content > click INSERT.
TIP: Videos embedded on event page
convert into link "Click here for
video" when inserted into V8
email.
Insert profile update reminder
MESSAGE > click select an insert
dropdown menu > select Profile
Update Reminder > click INSERT.
Tool Bar
Customize content in body of the
email using updated tool bar.
TIP: Hover over tool to display
tool title.
Add an attachment
MESSAGE > Click SELECT FILE > locate file > click Open > file name displays
> click ATTACH.
OPTIONAL: Click SELECT
ADDITIONAL FILE to attach
more files.
TIP: Formats accepted are Excel,
Word, PowerPoint and PDF files,
5MB maximum file size.
Insert signature on file?
INSERT SIGNATURE ON FILE
MESSAGE > insert signature on
file? > click toggle switch to YES > click INSERT
SIGNATURE ON FILE.
EDIT/CREATE SIGNATURE
MESSAGE > insert signature on
file? > click toggle
switch to YES >
click pencil icon
(edit). > enter/edit signature > click SAVE >
click CLOSE or INSERT.
TEST
NEW FEATURES
- Two-step process combined with
yellow SEND TEST button
to differentiate from red
SEND EMAIL button
avoiding accidental sending.
- Send test email to additional
recipients – administrators,
agents, members and
spouses.
TEST > send test? > click
toggle switch to YES >
send to yourself (choose email if you have multiple
email addresses) > click SEND
TEST > view summary >
email is saved to DRAFTS folder >
go to your personal email inbox to
proof.
OPTIONAL – also send to > click Choose >
select Member > click Select a
Member >
select desired member
name > click select email address > select desired email
address > click SEND TEST .
TIP: Use the + icon to add
another.
SEND
NEW FEATURE Two-step
process combined with red SEND
EMAIL button to differentiate from
yellow SEND TEST button avoiding
accidental sending.
SEND > ready to send? > click
toggle switch to YES > click SEND
EMAIL > view summary
> email is saved to SENT folder.
VIEW EMAIL
DRAFTS
NEW FEATURES
- Filter by year
- Search by subject line
- Back to TOP button
Access
Go to Administrators Control Panel
> COMMUNICATIONS > click VIEW
EMAIL DRAFTS > or click DRAFTS tab in editor.
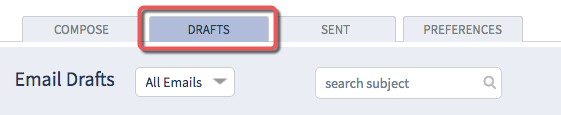
Filter
Default is All Emails. To filter by
year, click All Emails >
select desired year.
Search
Enter keyword > click the magnifying glass or enter on
keyboard.
Open
Find email in list > click OPEN.
Delete
Find email in list > check box in left
column > click DELETE SELECTED >
click OK.
TIP: Use this to delete large amounts
of drafts.
Back to Top
Click TOP.
VIEW SENT EMAIL
NEW FEATURES
- Filter by year
- Search by subject line
- Back to TOP button
Access
Go to Administrators Control Panel >
COMMUNICATIONS > EMAIL > click SENT EMAIL > or click SENT tab in editor.
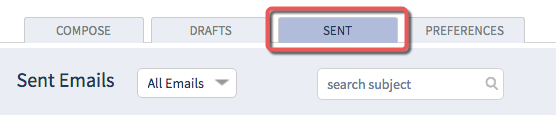
Filter
Default is All Emails. To filter by year,
click All Emails > select
desired year.
Search
Enter keyword > click the magnifying glass or enter on
keyboard.
TIP: Click arrow circle
icon to reset.
Reopen
Find email in list > click REOPEN.
Delete
Find email in list > check box in left
column > click DELETE SELECTED >
click OK.
Back to Top
Click TOP.
Report
Click REPORT to view sent summary.

NOTE: V1 Sent Emails display in V1
report format. V8 Sent Emails display
in V8 report format.
NOTE: Emails sent from V8 editor
display FROM and CREATED & SENT
BY: information. Emails sent from V1
editor do not.
