
1. Admin Control Panel > COMMUNICATION > click SEND EMAIL.
2. Complete SENDER section.

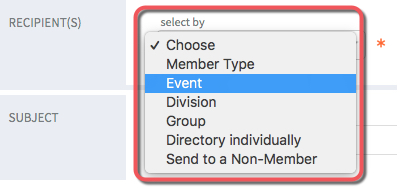
3. RECIPIENT(S) > select by > click Event.
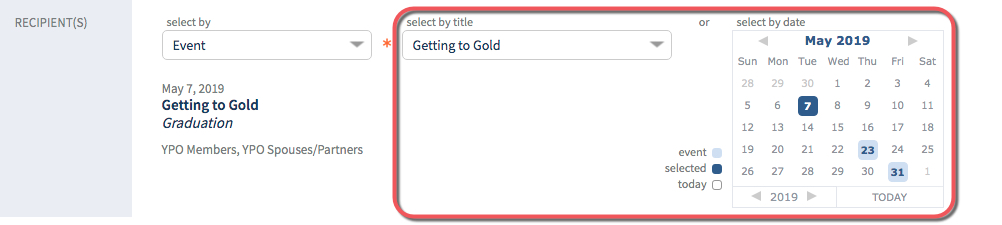
4. select by title or select by date > select event title or date.
5. send to > click Attendees.
NOTE: For events where member and spouse are invited – If the member is attending and the spouse is not, the email is sent to the member only and vice versa.
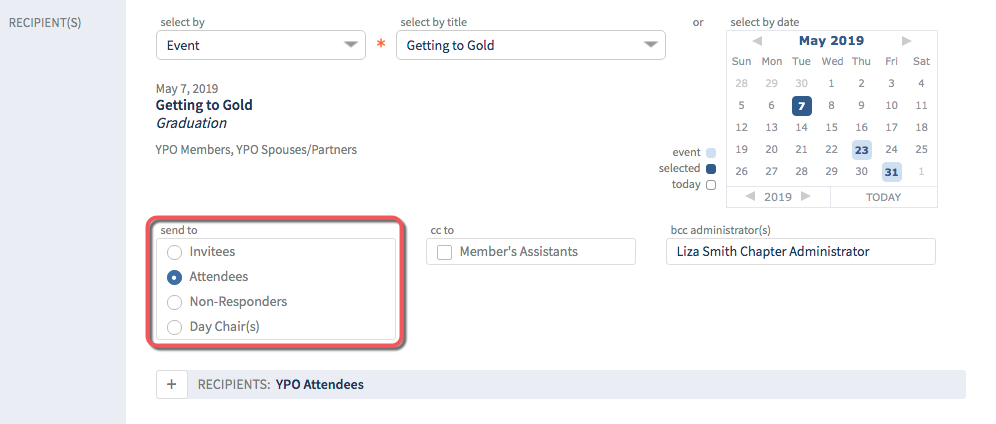
NOTE: If multiple member types > make selection.

OPTIONAL: Click + to view RECIPIENTS: Attendees names.

OPTIONAL: Uncheck names as needed.

6. SUBJECT > type subject.

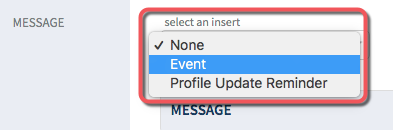
7. MESSAGE > select an insert > click Event.
8. select by title or select by date > select event title or date.
9. insert event sections > select desired event information.
10. select editable or not editable version to insert > click INSERT.
TIP: For an explanation of the differences between these two options, hover over the orange info icon.
11. MESSAGE > event inserted > edit as needed.
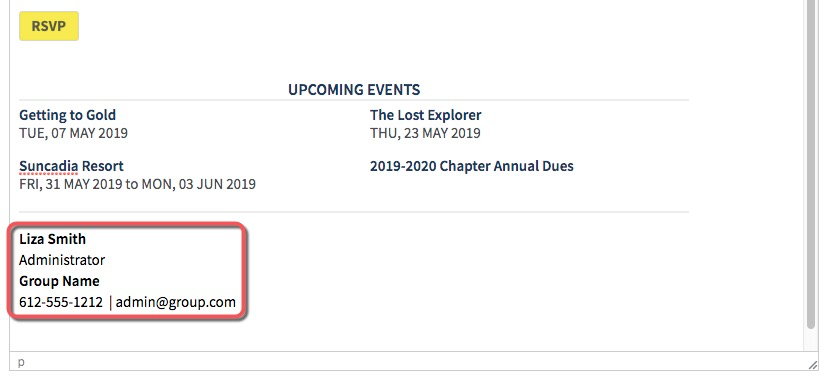
TIP: The yellow RSVP button carries the Login Bypass Feature. When members click on the RSVP button, they are directed to the event without having to login. Do not edit the RSVP button or Login Bypass is removed.
OPTIONAL: Delete or Add a row to table. Click Table icon > select Row > make selection.
OPTIONAL: Insert Signature
A. insert signature on file? > click toggle switch to YES.

B. Click INSERT SIGNATURE ON FILE.

C. Signature added.
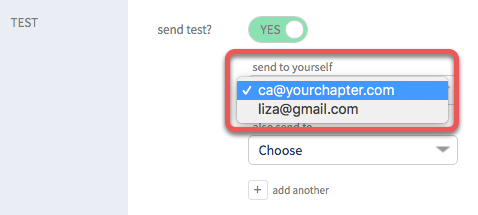
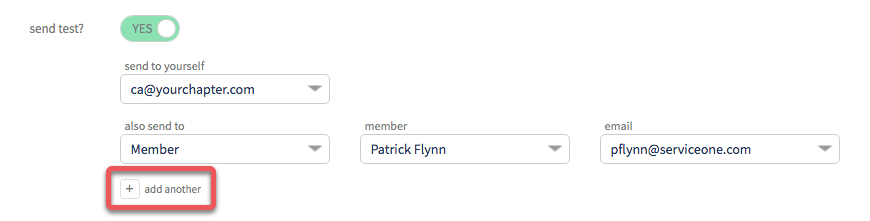
12. TEST > send test? > click toggle switch to YES.

13. send to yourself > choose email if you have multiple email addresses.
OPTIONAL: also send to Administrator, Member, or Spouse
A. also send to > click Choose > make selection.
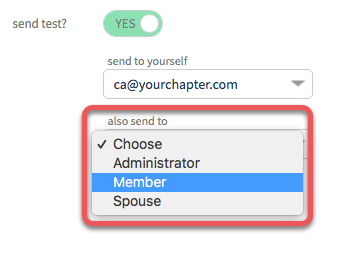
B. administrator, member or spouse > select desired name.
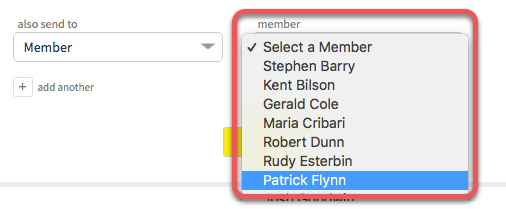
C. *If available > click select email address > select desired email address.

D. Use the + icon to add another.
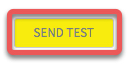
14. Click SEND TEST. View summary > email is saved to DRAFTS folder > go to your email to proof.
15. SEND > ready to send? > click toggle switch to YES.
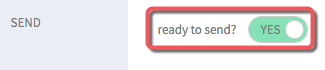
16. Click SEND EMAIL.
